You can have all the fancy camera equipment in the world and nothing beats the convenience and ease of your phone.
The main drawback has always been our phone’s editing capabilities but with apps like Lightroom CC, I have taken and edited some of my favorite pictures right from my iPhone X.
What Is Lightroom CC?
Lightroom CC for mobile and tablets is an app that allows you to take photos and edit and share them.
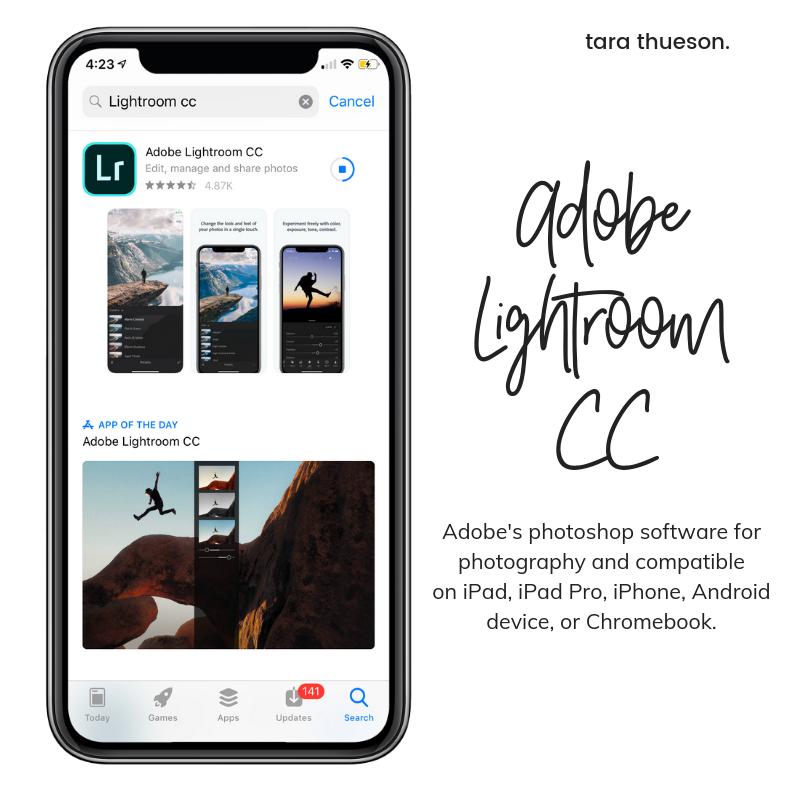
Lightroom CC comes preloaded with more than 30 presets (think of these as done-for-you filters) and its editing tools allow you to experiment with color, adjust clarity, and add vignettes.
Adobe offers Lightroom CC as a free app, though to turn on all features, it requires an in-app subscription priced at $4.99 per month, or $9.99 per month if you want to have 1 terabyte of cloud storage (this can be handy if you don’t have a lot of storage on your phone).
Getting Started
I get a lot of questions about editing photos on my iPhone because it’s quick and easy to do when you’re in the moment and want to get a photo edited ASAP. It’s also a really great app to have if you aren’t someone who works on a desktop/laptop and doesn’t work in Lightroom regularly.
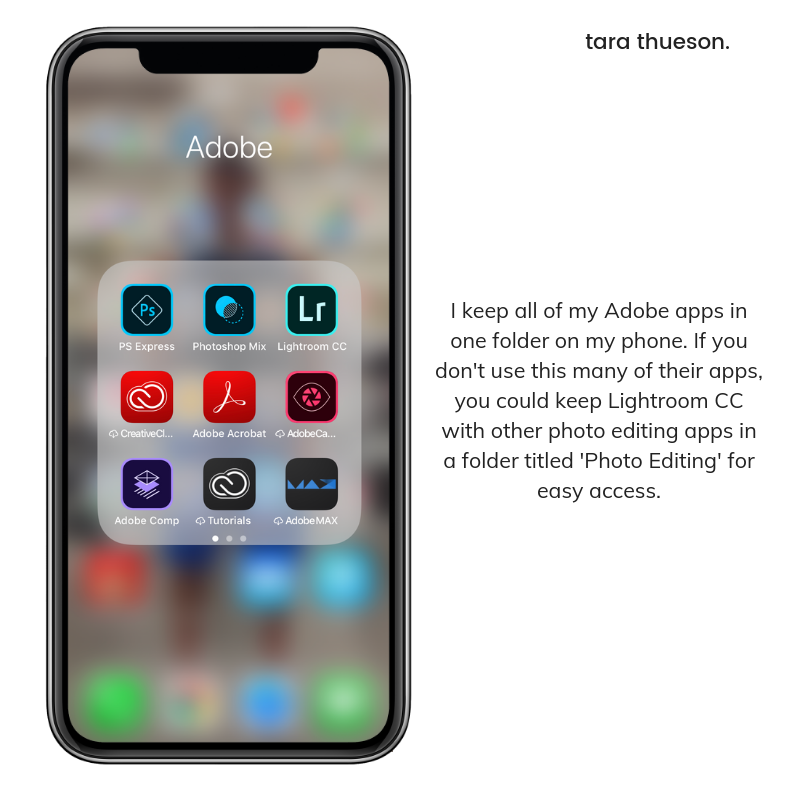
I showed you how I organized my apps on my phone in last week’s tech blogpost – if you need a refresher, you can read it HERE.
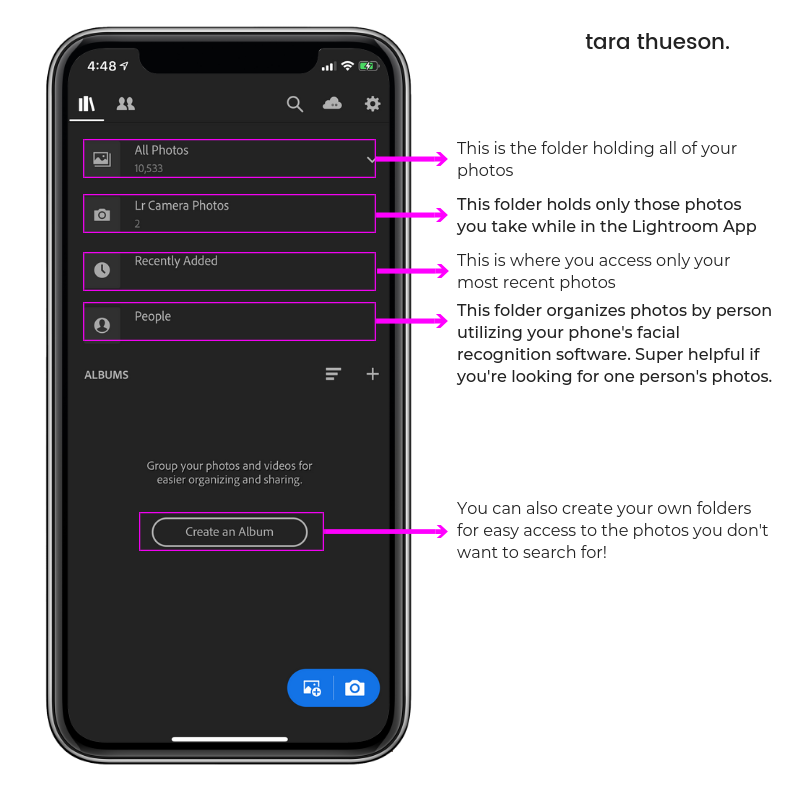
When you first open your app you’re going to see 4 folders:
- All Photos: this folder will import all photos in your phone’s main photo album
- Lr Camera Photos: this folder holds all photos taken on your phone while in the Lightroom app (super handy if you want DSLR-ish and raw images)
- Recently Added: this gives you quick access to your most recent photoshoot
- People: Lightroom CC utilizes your phone’s facial recognition software to organize photos by face – easily group together photos of the same person.
Once you’ve selected the photo you want to edit you can start fine-tuning the image to get your desired results.
Cropping & Straightening
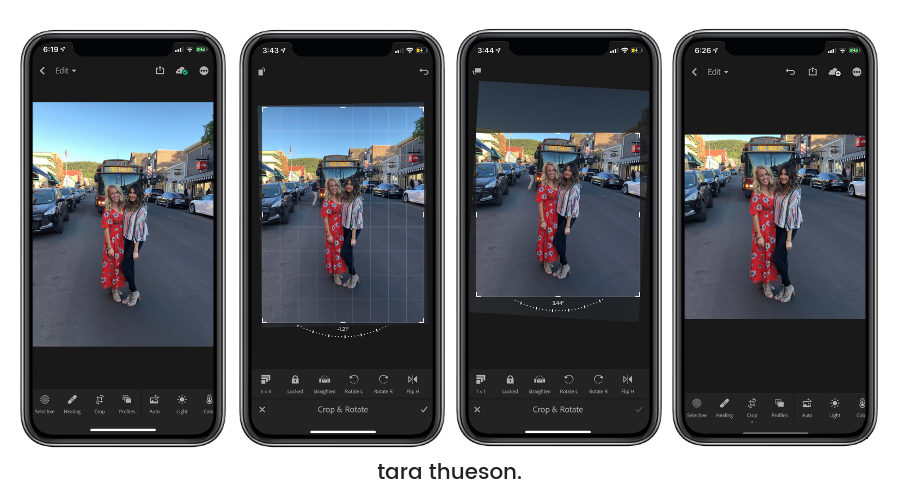
I don’t have to do this step often (by keeping your images taller and to a 4×3 ratio, your picture will take up more screen room in Instagram and will capture more attention) but it is handy when I need a perfect square or other specific-sized photos to work with. You can even rotate photos if your iPhone takes them sideways (sometimes the screen turns without you noticing). Tap Crop and choose a fixed aspect ratio from the menu, or drag the handles to use a custom ratio. You can also use the rotate dial to straighten your image. Tap the checkmark to accept the changes.
SHOP MY TECH FAVORITES
Edit Your Photos Using Presets
You see these all over Instagram and it seems every influencer who has a really defined style on their feed sells their own set of presets.
So what are presets? A Lightroom Preset is a pre-determined position for all (or some) of the of sliders in Lightroom (they are pre-set, get it?) In other words, you can edit a photo to your liking, and then save that exact combination of slider positions for future use on another image.
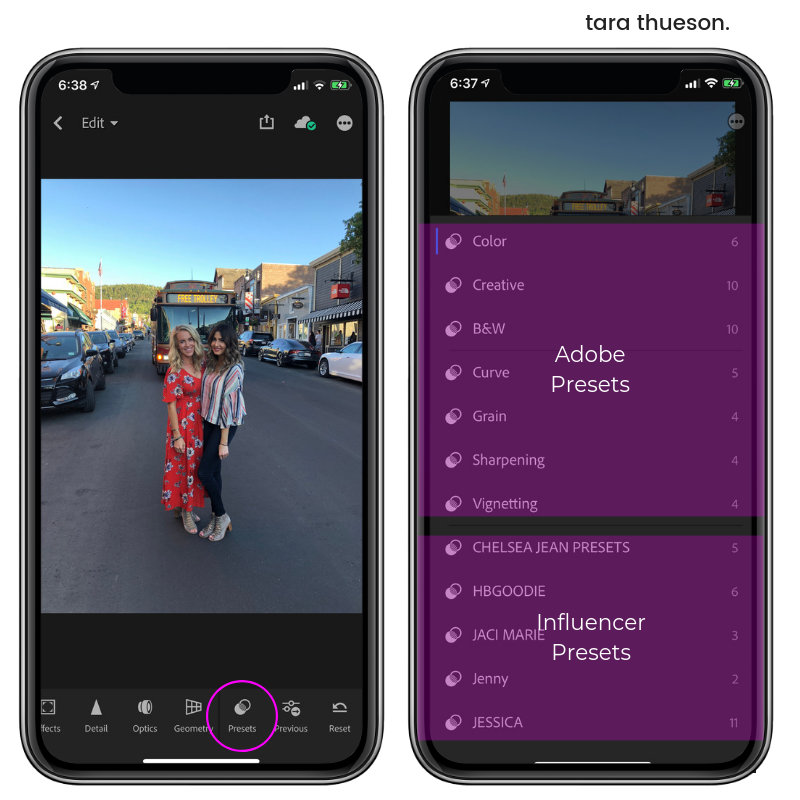
Your Lightroom CC app will come preloaded with 30+ presets that cover everything from really saturated photos to black and white. However, you may also purchase presets from influencers you love and whose aesthetic appeals to you.
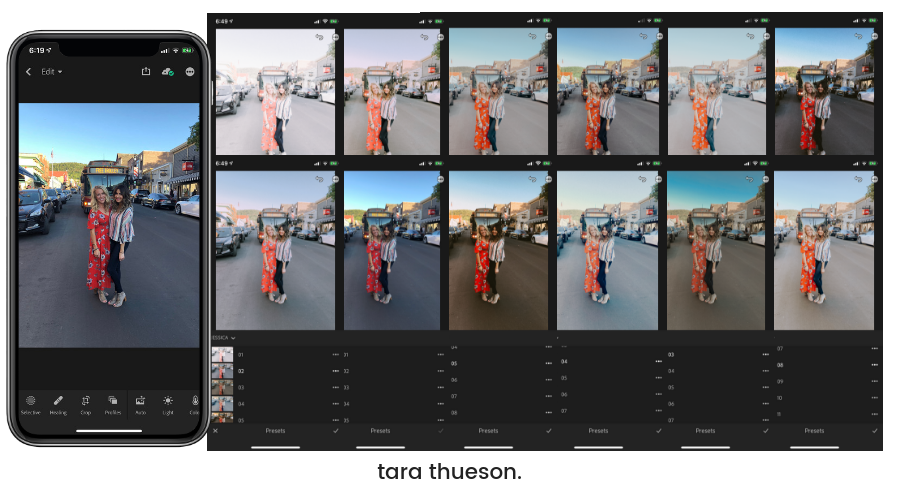
As you can see here, I’ve applied the presets from one category (there were 12 presets in this group) and each gives my photo a very distinct look. I can choose to be fine with this final edit OR I can add my own edits on top of the preset. I’ll cover that in just a minute.
Adjusting Light
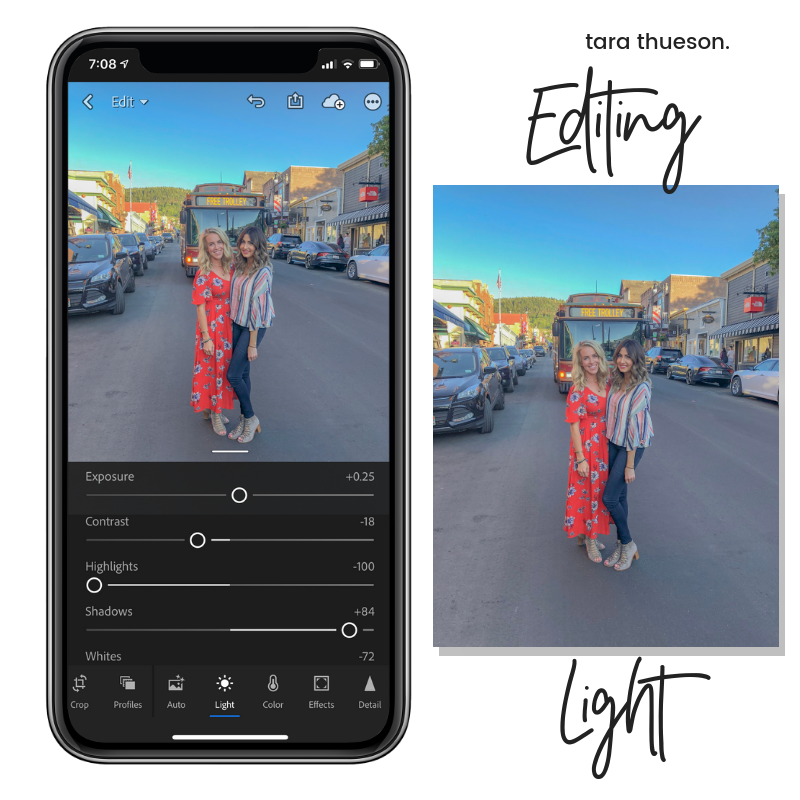
One of the most common edits on a photo is light. To do this, tap ‘Light’, and then adjust the Exposure and Contrast sliders to make your photos pop. you can also increase highlights and darken the shadows to create more contrast in the bright and dark parts of your image.
Adjusting Color
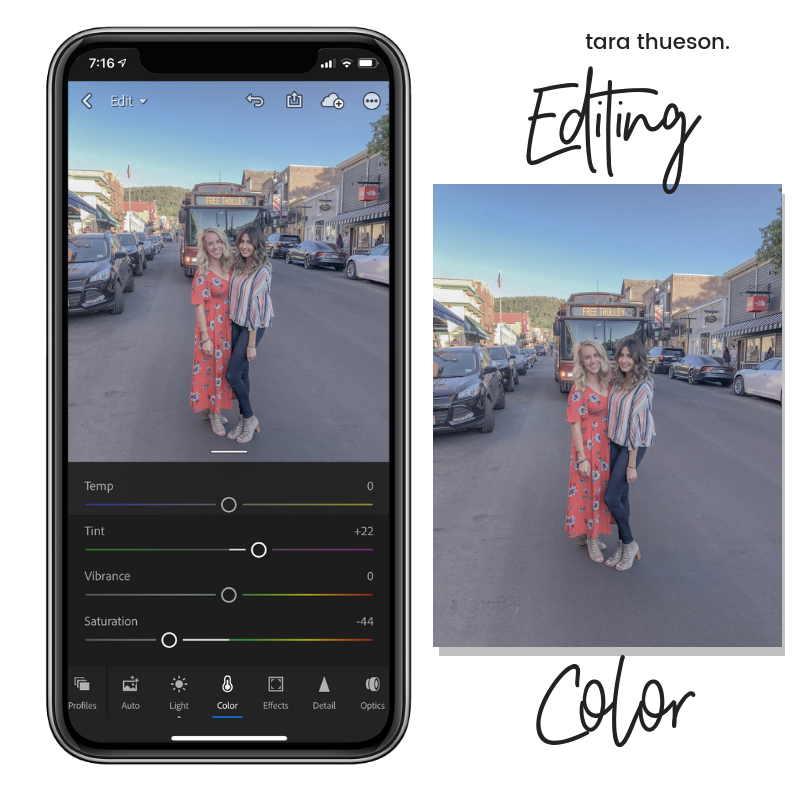
If the color in your photo doesn’t reflect the vividness of the original scene, tap Color and adjust the Temperature slider to create a warmer or cooler image – this is also referred to as ‘White Balance’. When white balancing your photo, the idea is to get the whites of the photo as exact to true white as possible. Go too cool and you’ll end up with a blue and cold photo. Go to warm and you’ll end up with yellow hues that make everything look a little over-tanned. You want to find the balance between where your whites just look white.
Use the Saturation slider to increase or decrease the intensity of the colors in your photo. Be careful not to oversaturate your image — the colors can easily become too intense. An alternative is to use the Vibrance slider, to focus on increasing the intensity of the more muted colors in your photo.
Adjusting Effects
Photos contain a lot of details that are worth enhancing. Tap Effects, and then experiment with the Clarity slider to add (or remove) contrast to the midtones of your photo (when talking about photographs and photography there are three areas of ‘tone’ within the total range of color in an image, The Highlights contain the brightest tones, the Shadows contain the darkest, and the midtones contain everything in between). Often this brings out detail in the textures of your image. The Vignette slider darkens or lightens the edges of your photo. Slide it to the left to darken the edges and put a subtle focus on the subject in the center of the photo.

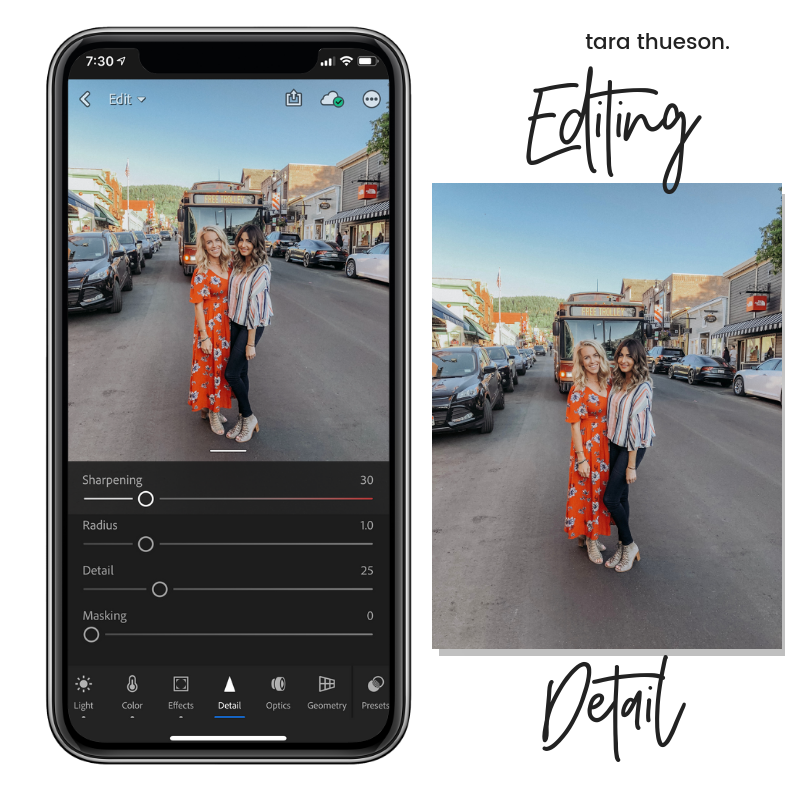
Adjusting Details
I love this feature. I love that you can go in after all of your editings and sharpen your image or soften it a little bit (you know, when you’re in between botox touch-ups 
Creating Your Own Presets
See what a difference a few tweaks make? Even just lightening the shadows on a dark picture can make all the difference in the world.
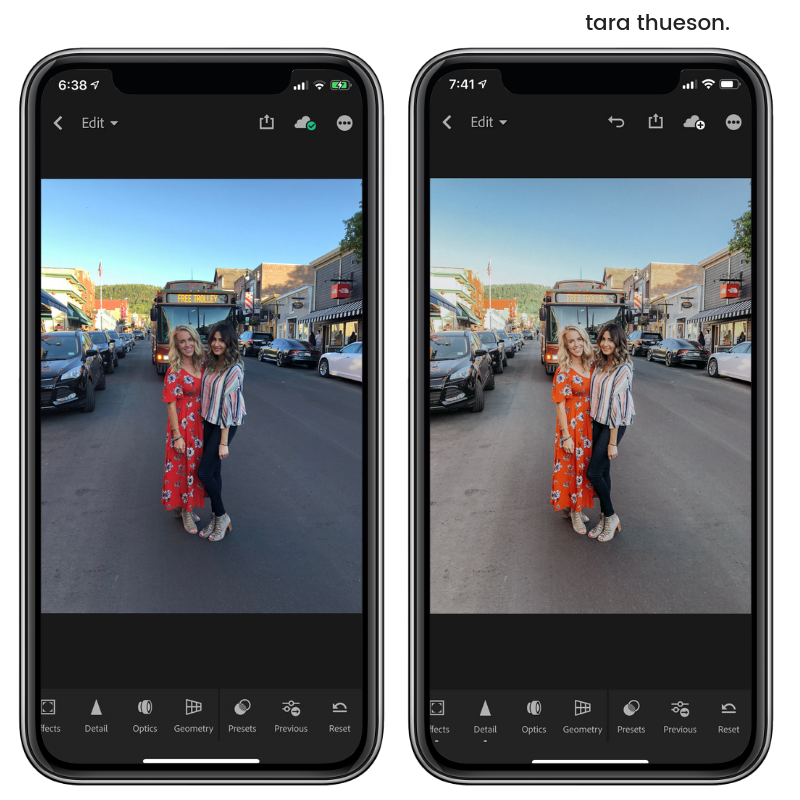
Once you’ve got your picture right where you want it, you may want to consider creating a preset from your current edits. It means less work for you and you don’t have to start from scratch next time you edit a photo. Presets will also give your photos a more ‘uniform’ look.
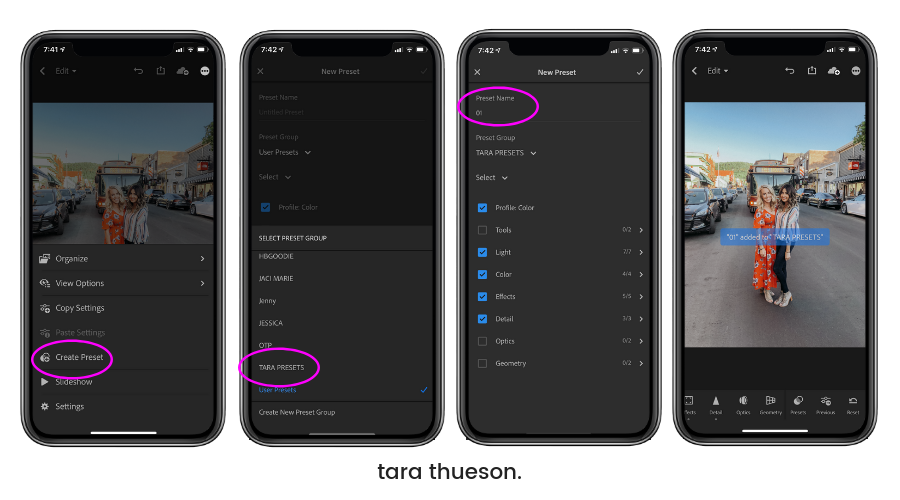
- Start by clicking the 3 dots in the upper right corner.
- Select ‘Create Preset’
- Select which preset group you want to put your new preset in or select ‘Create New Preset Group’
- Then name your new preset
Once you complete these steps, you’ll be able to apply this new preset to any photo that you open in Lightroom CC.

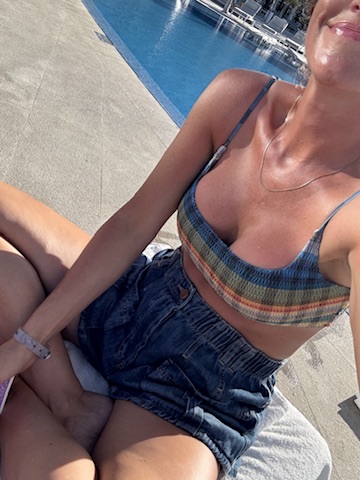
I forget how blonde I actually went this summer!
These steps are the basics when it comes to photo editing on your iPhone. I’ll be doing more training on Lightroom CC and other photo editing apps soon but I want you to play around and get comfortable with adjusting the basics: light, color, effects, and details.
I’ll jump into spot editing and some of the other really cool things you can do in this app.
Stay tuned for part 2 and make sure you check back every single Tuesday when I post these techie posts!
xx Tara















I love this blog. I downloaded the app. Do you recommend buying the feature already? I know you mentioned the editing or some of the presets are not available until the in app purchase is complete. I look forward to learning this app because I don’t really edit my photos. I sometimes use the filters on Instagram but I’m not that experienced and I want to get better.
I especially love this because you mention bringing out the color, with selling clothes I want to show the true color of items. I appreciate you sharing your knowledge.
Victoria
Do you have your own presets that you sell?
Hey Victoria – you’re going to get all of Adobe’s presets with the free version – just not all of the functionality. But if you’re just starting out you should be fine!
I don’t! But maybe someday!