Aside from being a global pandemic, COVID-19 is wreaking havoc with my entire self-care routine! Thank goodness I know how to dye my own hair and my skin is taken care of with TULA.
And with nail salons closing their doors as a public-health precaution, keeping my fingernails bare is the easiest option (obviously). But I need as much normalcy and things that make me happy. Having my nails done is one of those things.
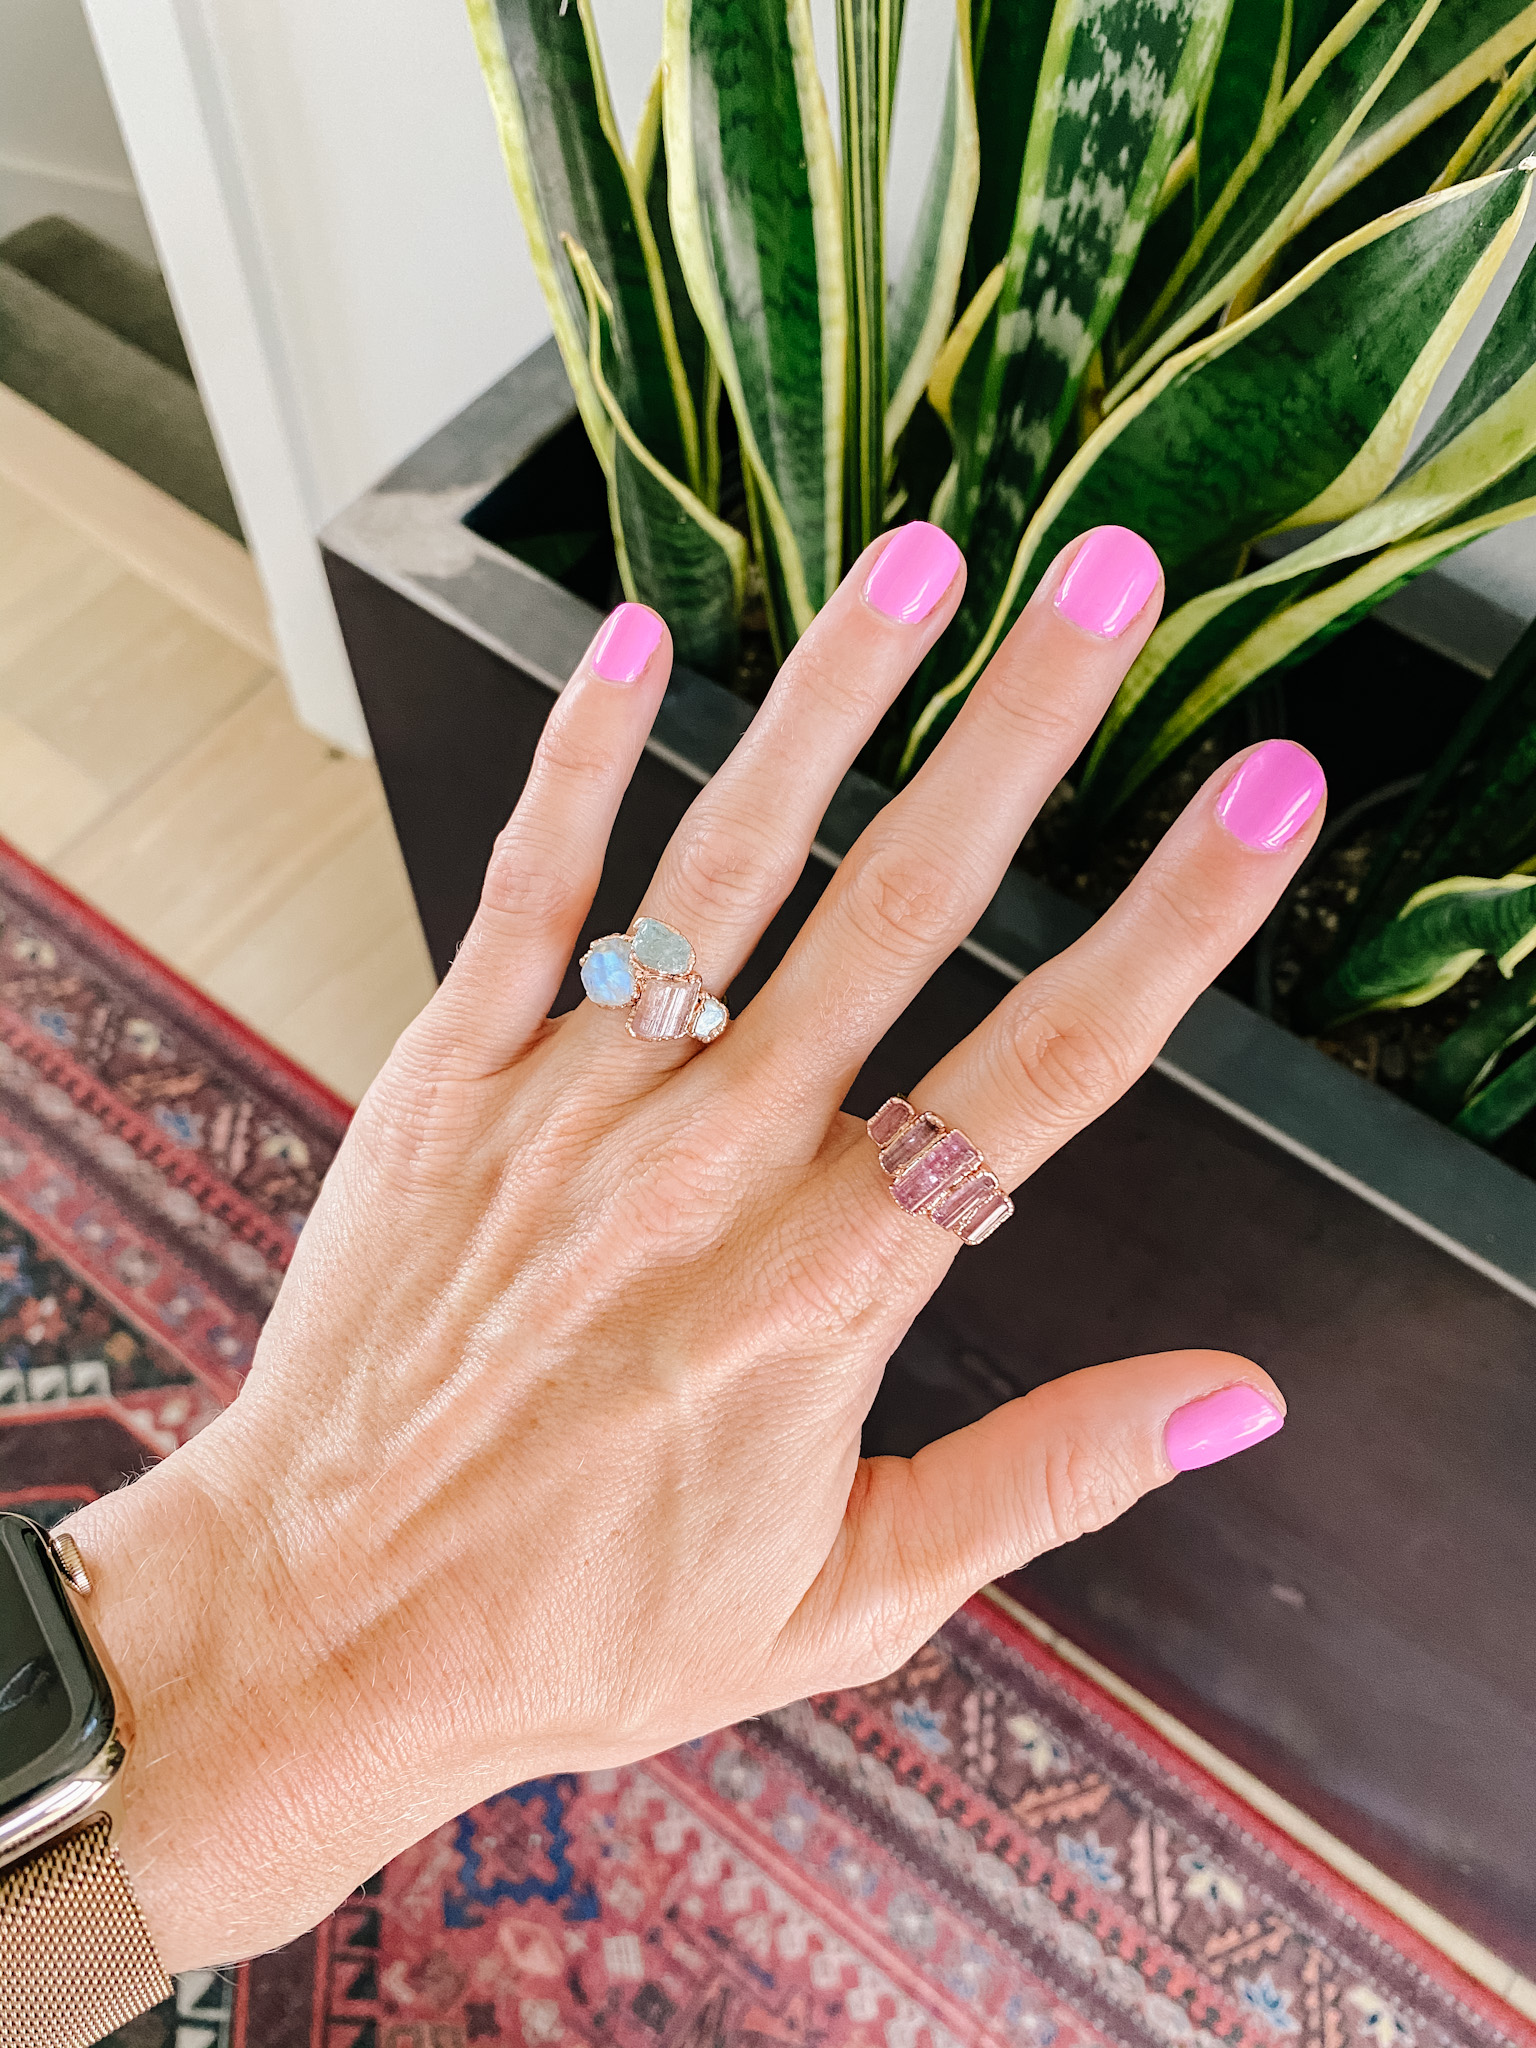
I just love the way my nails look when they’re painted, and IMO, a gel manicure is way better than regular polish. (Sorry, I don’t see a point in painting my nails if they’re just going to chip in two days!) If you want to keep (or start) doing your gel nails at home, I promise it’s not that hard.
So I’m giving you a step-by-step guide on how to do a simple, straightforward minimalist gel mani that can be achieved with professional-looking results right from your couch.
Your Supplies
1) Nail File (preferably 100/180)
2) Protein Bond
3) Base Coat
4) Gel Polish
5) Top Coat
6) UV/LED Lamp
7) Rubbing Alcohol or Non-Acetone Nail Polish Remover
8) Lint-Free Nail Wipes or Paper Towels
You may also want to consider purchasing a cuticle pusher or nippers but neither is necessary. You can always take a warm washcloth and push back your cuticles before polishing!
SHOP ALL MY NAIL SUPPLIES

• • •
NAIL PREP
1) Push Back Your Cuticles
You can do this with a cuticle pusher or a warm washcloth. This is always best done while the skin is soft and/or wet – you can do this as you get out of the shower!
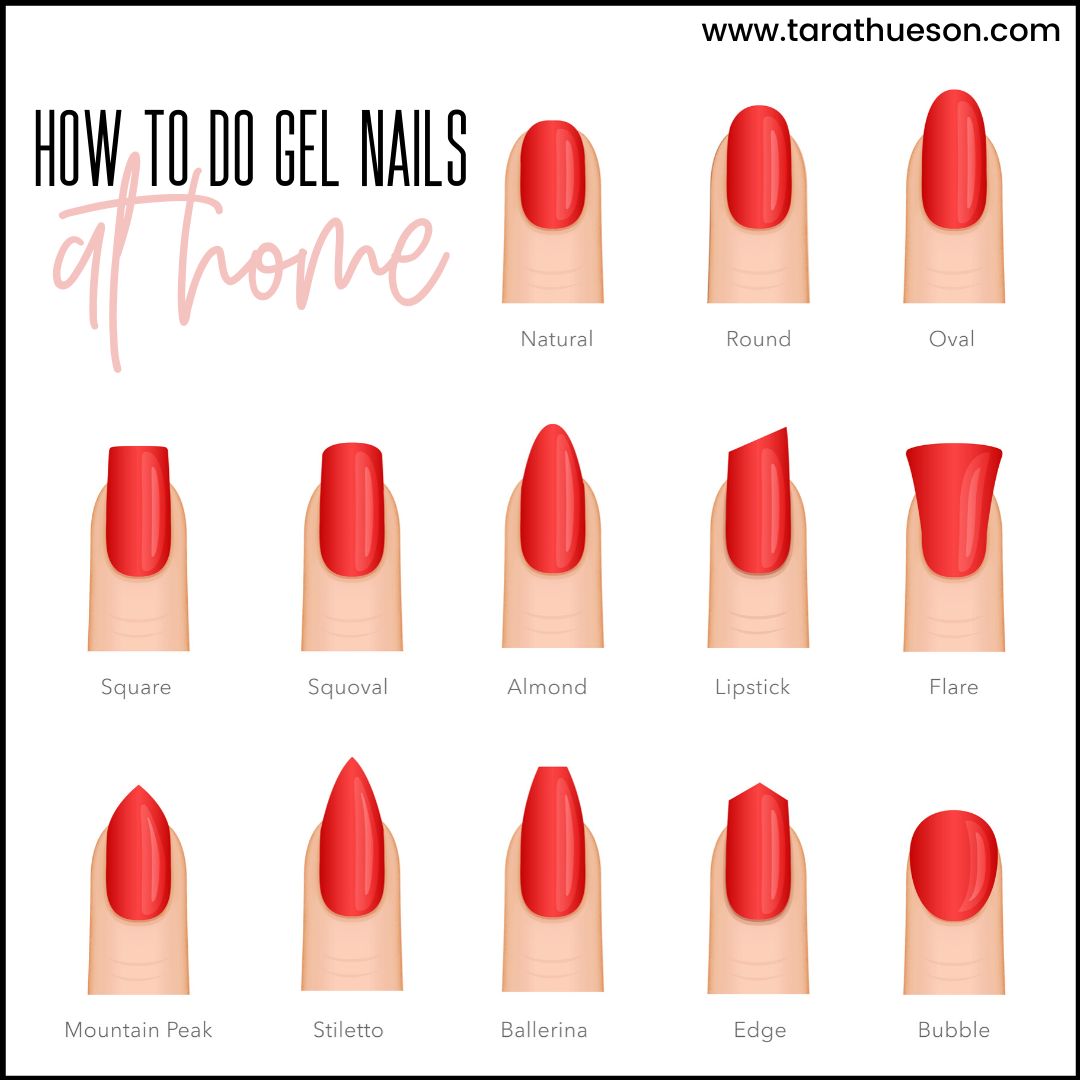
2) Shape Your Nails
This is usually where it goes all wrong! Do yourself a favor and file in one direction. Start from the outside edge and continue in a side-to-center movement. Doing this will give you more control over your shape.
Whatever you do, don’t “see-saw.” Filing back and forth weakens nails and can cause tearing and premature chipping! If you have quite a bit of length to take off, use nail clippers and then file to refine and smooth your shape. Check out this chart for ideas on your nail shape:
3) File The Top of The Nail
This can be done with the softer side of your file. This ‘roughing’ up of the top of the nail gives the gel texture to adhere to.
4) Nip Any Hangnails or Dead Skin
This is a step you can totally skip but if you do plan to do it, make sure you are only cutting dead skin – if you’re unsure, skip this step and just make sure you moisturize your cuticles every day to keep them healthy!
5) Apply Your Protein Bond
Make sure you don’t skip this step! Applying a protein bond to the nail creates a stickier surface and provides an anchor for gel. It can mean the difference between a 1-day mani and a 2-week miracle!
SHOP MY GEL NAIL ART PICKS
• • •
Paint Like A Pro
1) Apply A Base Coat
Swipe on a base coat—it’s basically the foundation for any fire gel mani. After applying a coat, cure the nail in your UV lamp for up to 30 seconds. (P.S. Depending on the type of lamp you have, the time could differ – just follow the directions.)
If your nails are really thin, a second base coat might provide additional strength.
2) Pick Your Nail Color & Apply 2-3 coats
Next, pick a color (or colors) and start painting your nails. Between each coat, cure the nail with UV lamp, and repeat this until you have a nice, opaque color. Aim to paint in three strokes. Starting in the middle of the nail, use the shape of the applicator brush to push towards the cuticle in a clean line. Then repeat on each side until the entire nail is coated.
SHOP GEL POLISH
• • •
3) apply A Top Coat To Your Nails
Now for the finale—swipe a top coat over your nails. Always ‘seal’ your polish by running your top coat along the top edge of your nail after application, too. This helps to minimize chipping and extends wear-time. And then cure it one last time under your UV lamp. If you want to show your nails some love after this grueling process, finish off by adding a couple of drops of cuticle oil or use a cuticle oil pen for a nice, hydrating treat.
WATCH ME DO MY OWN AT-HOME GEL MANICURE
I promise, doing a gel manicure at home is way less hassle than doing a traditional polish job! Try this and then tell me in the comments below how it went!
Xx Tara

Where are your rings from?