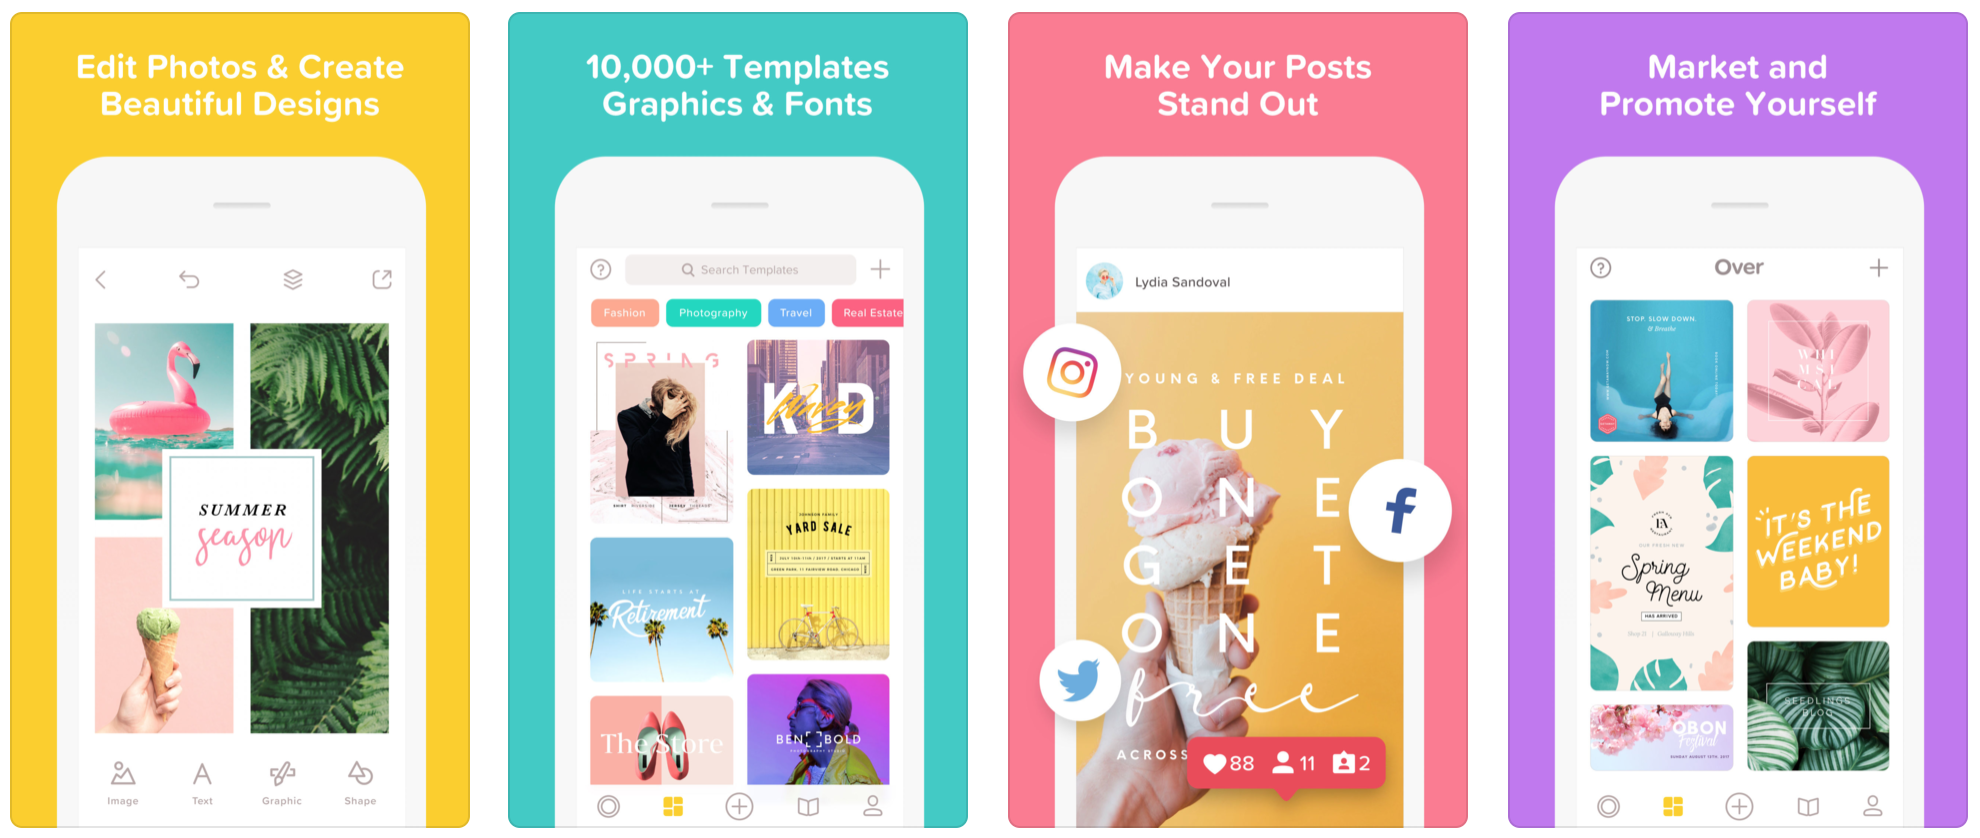
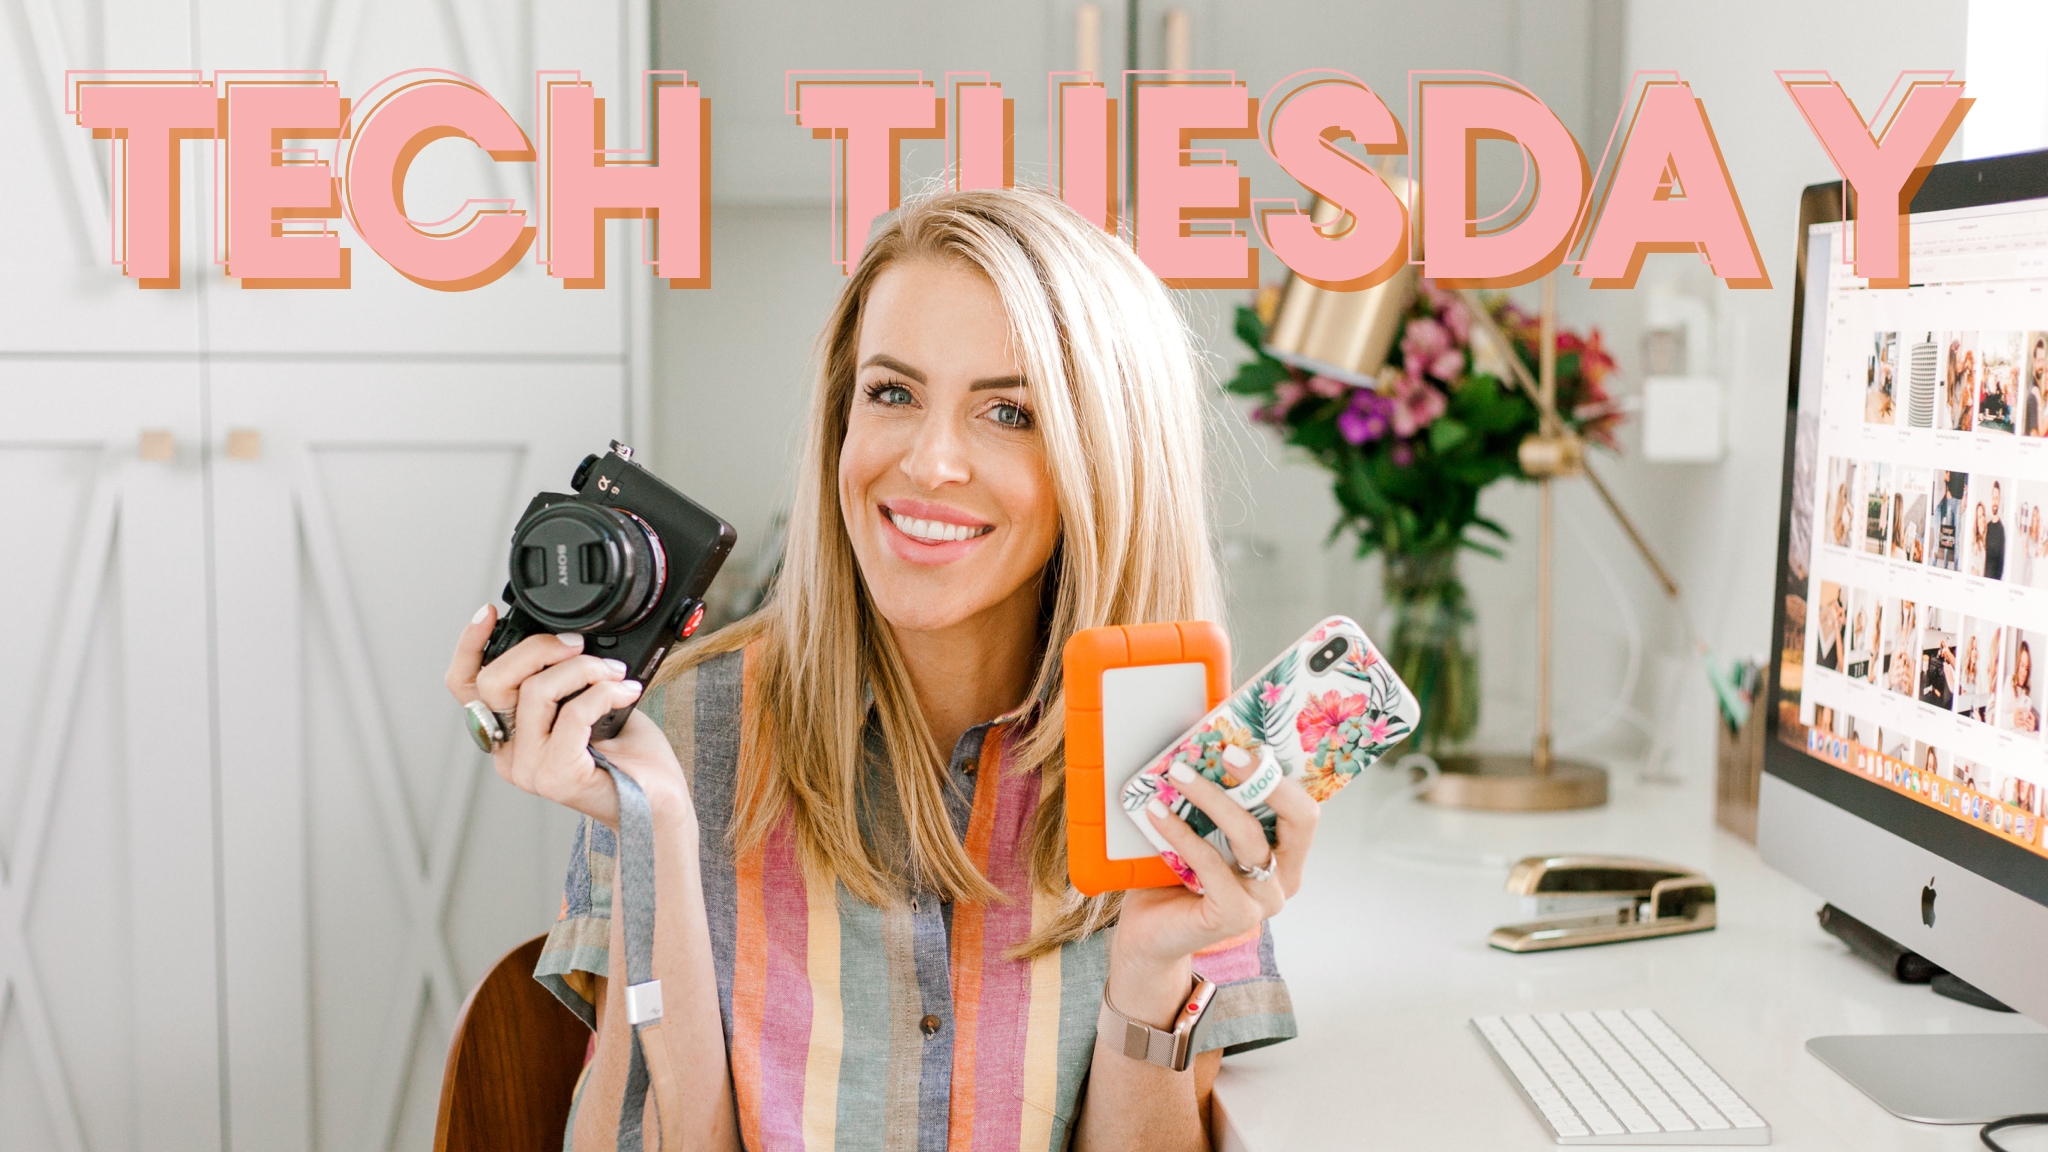
If you’ve been waiting for someone to combine Unfold, Spark, and InDesign in the perfect content creation app, buckle up and hold on tight because it’s here folks! Over is the app that takes every app I love and combines it into one, simple-to-use app that allows me to invent and create on the go! I love their layers and funky fonts, their layering and masking capabilities, and I love that I can make both static content as well as video – even combine the two!
Honestly? The best way to see this app at work is to check out their Instagram feed. It’s inspiring, totally creative AND informative, and shows you how you can explore the limits of your creativity all from the palm of your hand!
What they say
“This user-friendly design app makes it fun turning photos into gorgeous graphic art. With Over you’ll add exquisitely styled text, shapes and clip art to your images, all in a powerful interface you can control with your thumb. Just tap to select elements, then swipe to change colors, fonts, spacing—even nudge objects for pixel-perfect layouts. Over is flexible too, letting you customize its tools and features as your imagination grows.”
But instead of sending you off into the unknown, this #TechTuesday post is all about my favorite features of this must-have app.
But first, let’s talk about cost…
Yes, this app costs money. You can keep the FREE version but I found that I wanted unlimited access to everything it had to offer so I upgraded to the Pro version. I had the option to pay $11.99 a month but opted to save $$ and paid the year in full for $99. There is a 7-day trial available that you can do as well to see if you really need all the bells and whistles.
Basic: FREE Pro: $11.99/Paid Monthly $99/Pay The Year In Full
I’m not advocating that you purchase the pro-app when something like Canva may totally do all you need, but this app is the one you want when you’re ready to step up your game and blow away the competition.
Getting Started
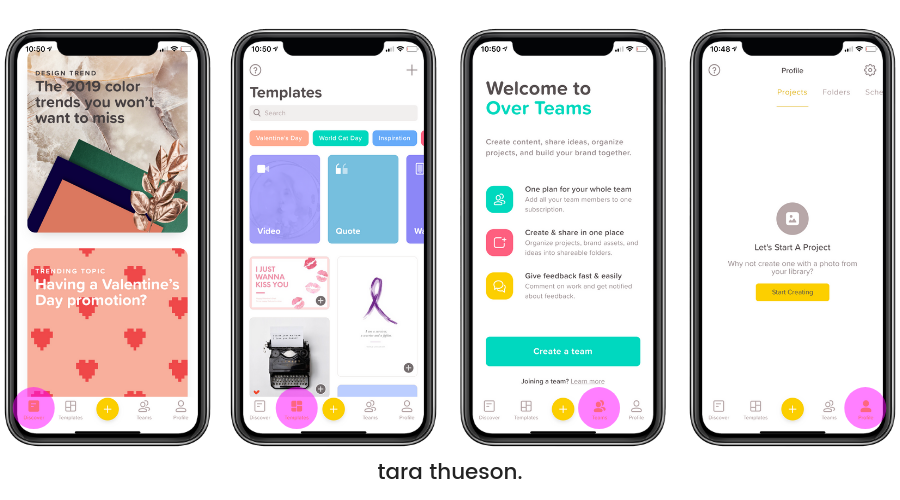
When you open the app, you’re going to have a few options:
- Discover: This is the place you’re going to find tutorials on certain features or effects, new graphics and fonts, and tips and tricks that will help you step up your content creation game. This is like a news feed chock full of everything you need to improve your output.
- Templates: Stuck on a blank screen? Need something quick? This is where you’re going to find templates sorted by size, channel (Instagram, Facebook, Web, etc), topic (holiday, invitation, video, quote), and by recent design and popularity!
- Team: This is an option if you have more than just yourself contributing to your business. But be warned: It’s EXPENSIVE. At $59.99 per month, you can add all your team members to one subscription, create and share all projects, brand assets, and folders, allowing you to give feedback easily and quickly!
- Profile: This is your hub for files, new designs, and every one of your projects new and in the works.
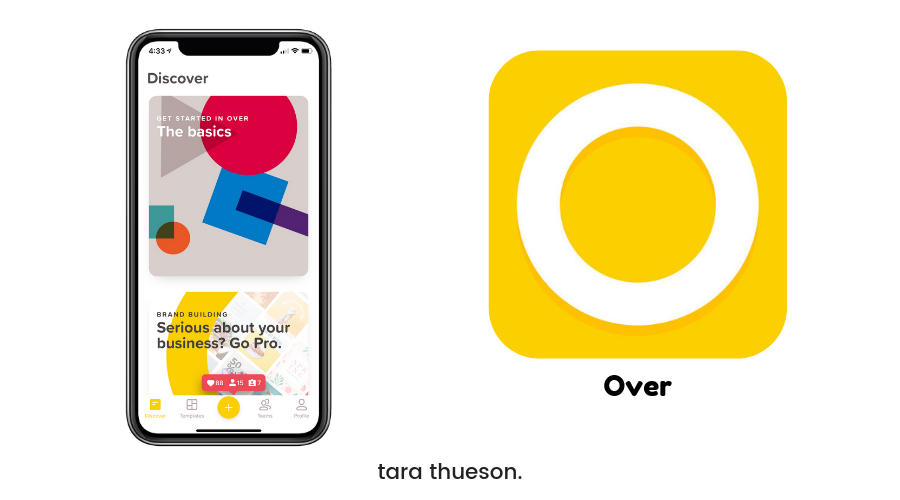
Discover
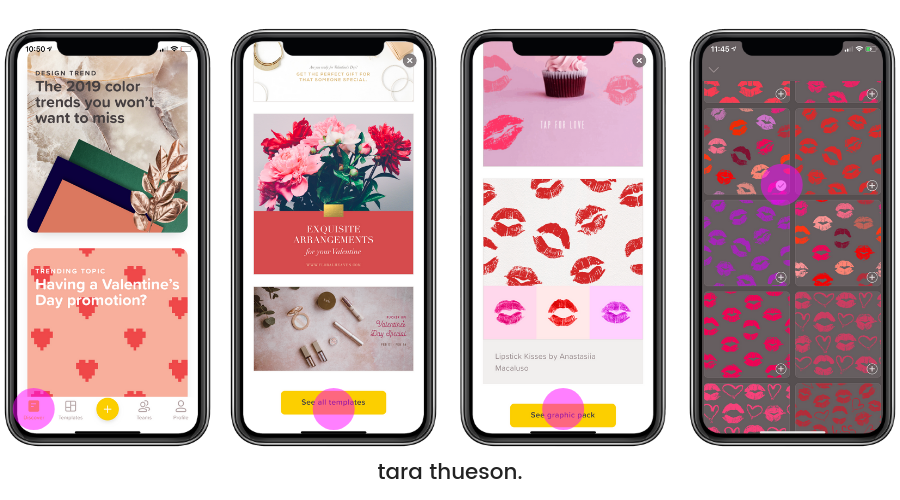
While pretty straightforward, this is one of my favorite features of this app. You’ll see topics like the ones you see in the first frame in the graphic above, and once you click through (like I did on the Valentine’s Day promotion one), you’ll see a slew of options. This particular piece has both templates and graphics packs that go along with it. Templates that help with promotions, invitations, V-day cards…so many options, and graphics that allow you to put your own personality on your creation!
Click on any of the yellow buttons to access the done-for-you pieces! More on this a little further on…
Templates
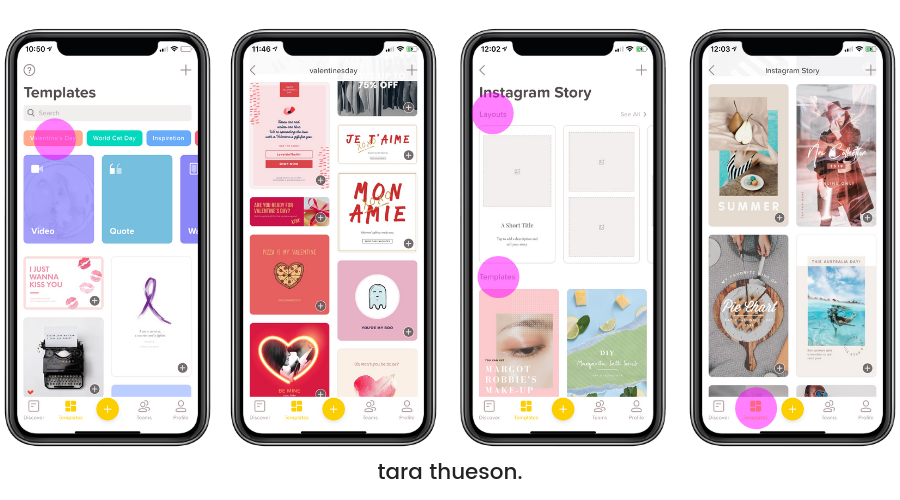
Need a business card? A new logo? Or maybe you need a quick template for Instagram stories that will provide the background to the polls you have planned. Whatever your need, templates is where you start!
Yes, you can start from scratch, but these templates are created by designers who know what looks aesthetically pleasing. They do the heavy lifting and all you have to do is switch out enough to make it yours. Change the font, the picture, the colors – without changing the overall look!
You can search by topic: specific holidays, social platform, video…type it in the search bar and I promise you’ll get a hit!
One of my favorite NEW features is the “Unfold”-esque templates that mimic those clean, modern-looking templates you see all the influencers using!
SHOP MY TECH FAVORITES

• • •
Profile
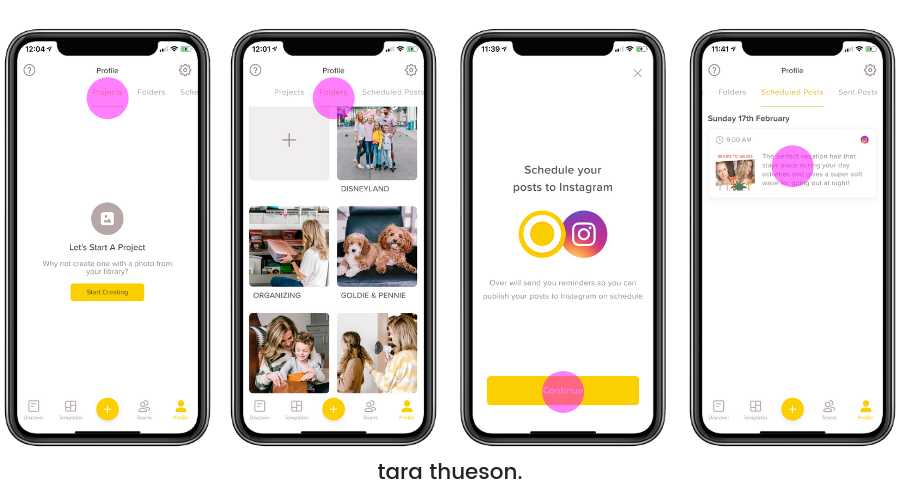
Profile is where you’re going to live. You can just click there or the ‘+’ sign in the center if you just want to dive right in with a new design.
Once there, you’re going to have the following options:
- Projects: This is where every single thing you create will live. Even if you’ve finished a design, you can still go in and edit every single aspect of it.
- Folders: This is a great way to organize all of your pieces. Instead of scrolling through hundreds of projects, you can simply click on a folder to access all of the designs from one specific project. Each piece of content you create can be saved to a folder at any time. You can see a few of minie above: ‘Disneyland’, ‘Organizing’, ‘Goldie & Pennie’…you get the drift!
- Scheduled Posts: This is where you can schedule posts to post to your Instagram account (similar to Planoly, Later, Plann…) and also where you can see every post you have coming up.
- Sent Posts: This is where all posts that you have published, live.
Creating a New Piece of Content
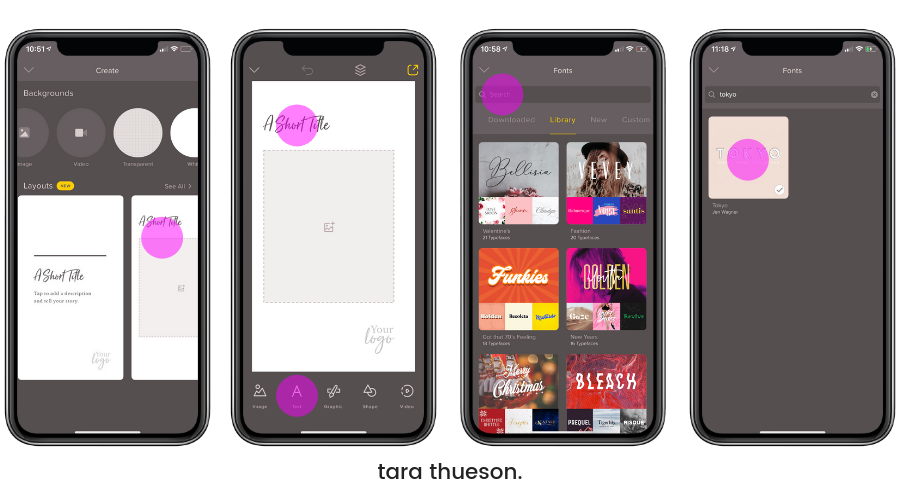
I love these new templates and wanted to show you how quickly you can easily make a graphic.
- Select a template
Once you open the template or start on a blank screen, you can add/edit the following items:
- Images
- Text
- Graphics
- Shapes
- Video
You will have the same editing options for every single group.
- Select your font: you can scroll through the available fonts and even type in the name of the font you’re looking for. Keep in mind that not all fonts will show in the main bar but if you scroll all the way to the right, it has a button for more options. There are hundreds (probably thousands) of fonts in this app!
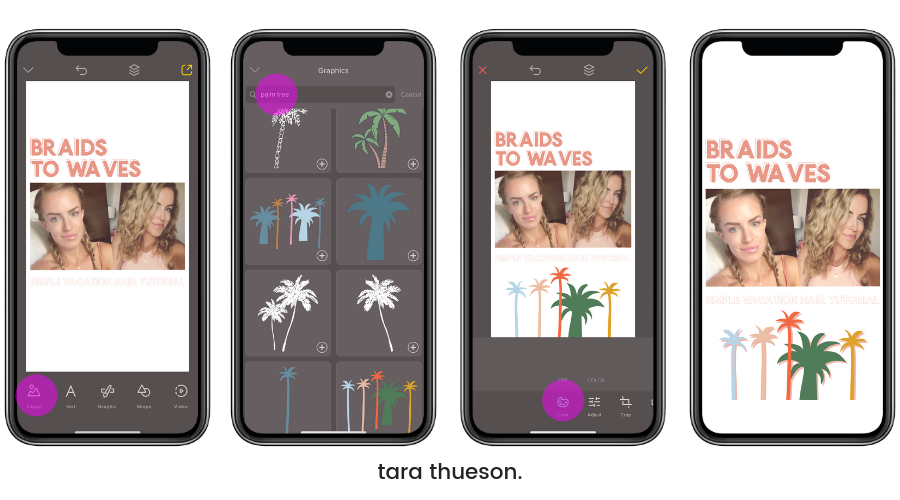
- Once I found the font I was looking for, I added the image I want to use for my newest hair tutorial video (you know, the one I promised a few days ago 😂) and once there, you have soooo many options. You can layer images, blur images, create a drop-shadow (and make it any color you want), erase partial images so the one underneath peeks through – your options are endless!
- I also decided to add a graphic to the bottom and so I selected ‘graphics’ down at the bottom menu and typed ‘palm tree’ into the search bar. Once I found one I was happy with, I placed it at the bottom!
Duplicating & Resizing Images
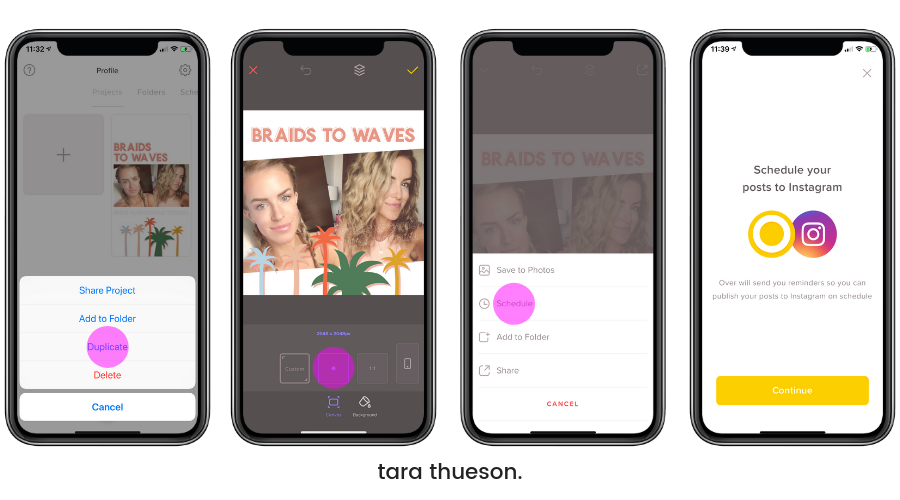
Once you’ve created an image, you may want to use that same image for a different purpose but don’t want to alter your only file. You can easily ‘duplicate’ the image by holding your finger down on the image and a menu will pop up. Once you’ve duplicated your image, you can scroll from left to right to select the correct image size.
I made it easy and decided to duplicate my Instagram Story image for a post. After resizing the image to a square and moving around the assets (text, picture) to fit, I scheduled this picture to hit my Instagram feed.
Scheduling a Post to Instagram
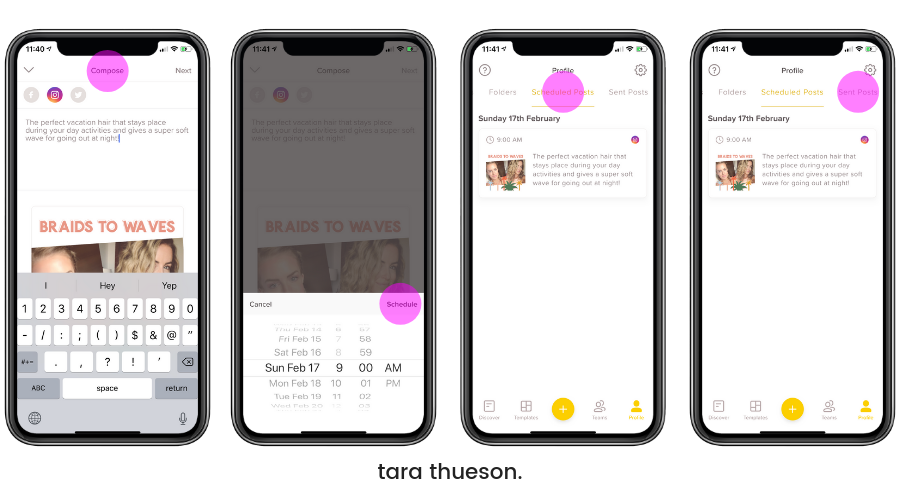
Scheduling a post is super simple!
First, you’re going to select a platform/social media channel to publish to. Second, you will be given the opportunity to type in your caption. Third, you will be able to select the date and time you want your post to publish.
You can always click on the ‘scheduled posts’ tab up at the top of your ‘profile’ screen to see what you have on the calendar!
Creating From Scratch & Utilizing Graphics
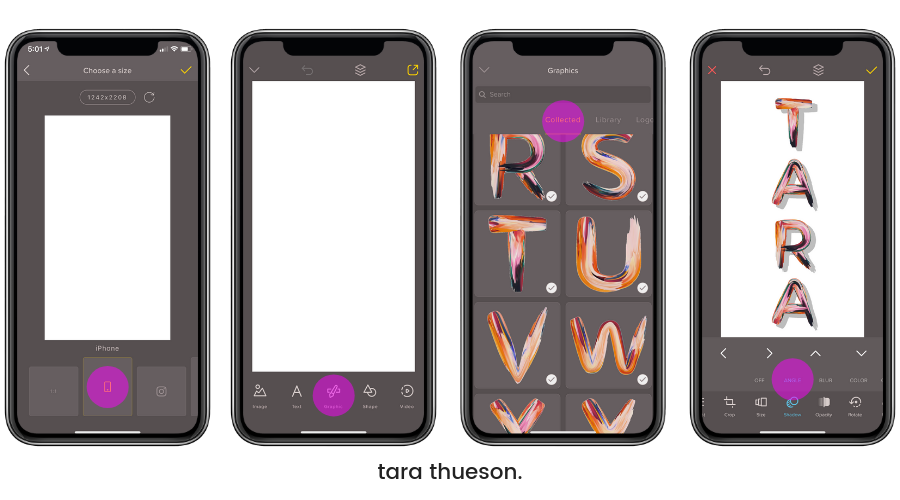
Remember those graphics you can download from the articles/blog posts on the ‘discovery’ page? Those are now available to you to create with!
- Select the ‘+’ at the bottom of the screen
- Then choose the size of your finished piece of content by swiping right and left
- I chose ‘graphics’ to add my intended design
- Select ‘collected’ – this is where you’ll find all of your download/native graphics like these fun letters!
Once placed, you can manipulate these graphics just like you would with simple text, images, and video! I used these letters to make a cute business card!
Creating Transparent Images & Logos
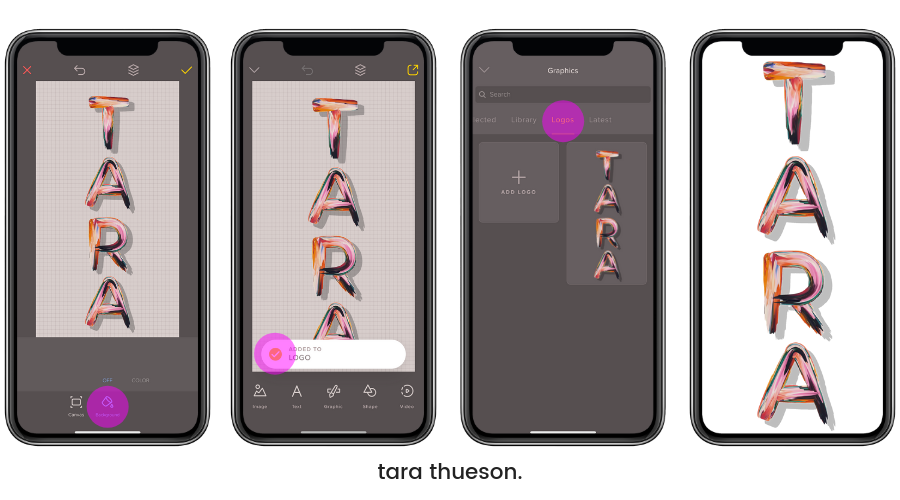
I wanted to show you one more thing that’s pretty cool – transparent images and logo work. When you click the ‘+’ sign to create a new design, you’ll also be given the opportunity to select what background you want:
- image (start with a full frame photo)
- video (start with a full frame video)
- transparent (anything you add to this will have nothing in the background)
- white (anything you add will have a white background)
- black (anything you add will have a white background)
It’s this 3rd option that gives you a ‘sticker’ appearance. I selected this option and then added these graphics on top to create my name. Once I was happy with the design, I saved to my logo folder and now the app will keep this in its files so I can lay it on top of an image. I also added a drop shadow for a fun effect. Have an image like this without a background allows me to layer it on any other image or graphic I want!
I promise – you’re going to love this app! Use the masking tool to create this awesome effect with the words behind my head or try any of the other 1,000,000,000,000 effects you can create in this app.
It’s bound to become a favorite!
xx Tara
P.S. If you want to learn more about the tech in your life, check out all of my “Tech Tuesday” posts HERE.
Download ‘Over’ on: iOS | Google Play
Sometimes I am so lost in your posts. HAH! I am like, how does she learn all these things lol.