You might remember this gem from My Top 5 Apps for Instagram blog post a while back and I wanted to dive a little bit deeper today and really show you how awesome this app truly is!
The first and most important thing you should know about TouchRetouch is that it gives you the tools to remove unwanted content in your photos. It’s super simple to use and lets you remove those minor annoyances that muck up your shots: telephone poles, trees, birds, photobombers, etc.
But bear in mind – it’s not perfect. But, with a little bit of patience and this quick walkthrough, you’ll be editing Cousin Eddie out of all future family reunion pics without breaking a sweat.
Ready?
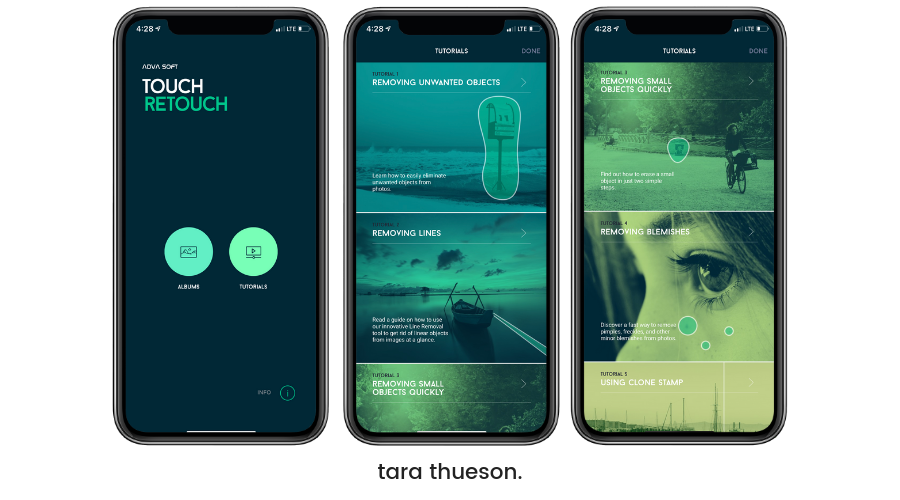
Navigating The Home Page
When you open the app you’re going to see two options: Album, which takes you to your photo album to select the photo you’d like to edit, and ‘Tutorials’, which takes you to their 5-part tutorial series.
I’m going to teach you how to do some of the things I find the app most useful for!
Removing Unwanted Objects
No rocket science here. You don’t want it in your picture? Get rid of it using TouchRetouch’s Object Removal Tool
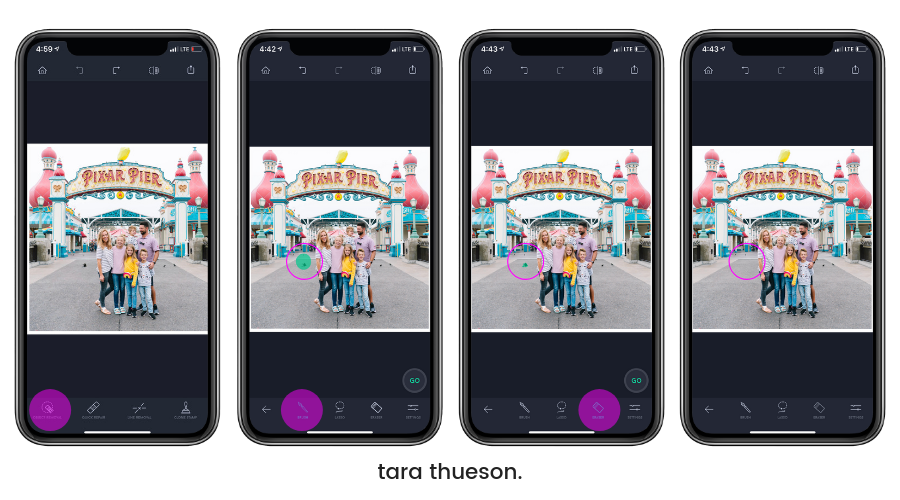
Step 1: Mark an object with Lasso or Brush
Step 2: With the eraser, unmark any area that was overmarked
Step 3: Tap ‘Go’ to remove the object
[flex_row]
 [/flex_row] Can you spot the difference? I removed 7 items from this photo just to help clean it up!
Pro Tip: You can zoom in and get pretty precise so don’t let those tiny items fool you. You can use a brush (similar to coloring over the items you want to remove), lasso (draw a circle around what you want to remove), and erase anything you don’t love about your edit!If you can’t seem to get the right edit you may want to remove the object in parts. You can also try retouching the same place a few times. If this doesn’t work, try cloning (see below)
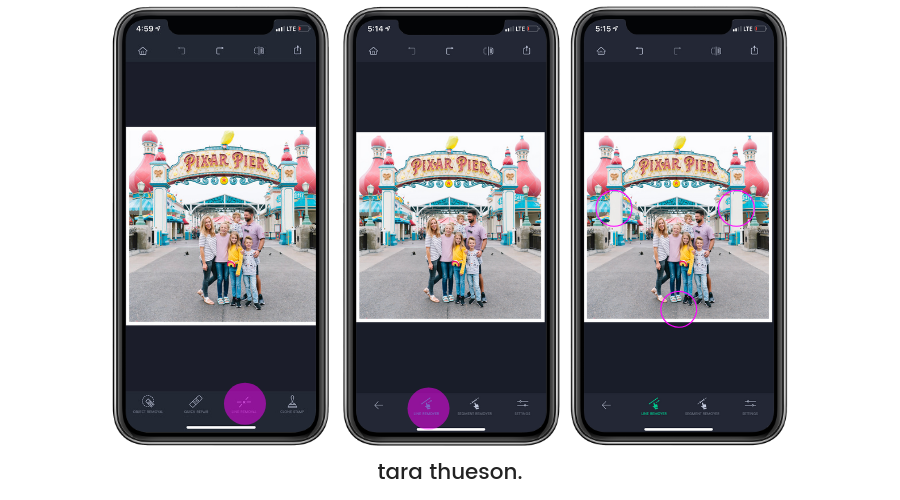
Check out Annie’s before and perfect after beach shot!
[flex_row]
 [/flex_row]
MY CAMERA GEAR

Removing Lines
I haven’t found a ton of uses for this one but it’s one of the main editing tools so I thought I’d include it here! You’re going to start by select ‘Line Removal‘.
Step 1: Select ‘Line Remover’
Step 2: Mark only part of a line to remove all of it
Step 3: Select ‘Segment Remover’ and mark a whole segment to remove it
[flex_row]  [/flex_row]
I removed the lines in the sidewalk as well as the lines on the columns, obviously not necessary, but I wanted you to see it ‘remove the lines’ 😂- I think this is super helpful if you’re removing power lines, strings, or anything that runs right through your picture!
Pro Tip: If you are trying to remove a line and it’s distorting your picture or the border of an object in your picture because it’s too wide, you can click on ‘settings’ while doing line work and make your lines thinner!
Removing A Small Object Quickly (Including Blemishes)
I love this one – it’s super useful and can be accessed by selecting ‘Quick Repair’ from your main editing screen! You’re going to have 2 options here: Quick Brush and Blemish Remover. They’re super similar but also very different and the results are quite different. Here’s how you use ‘Quick Brush’:
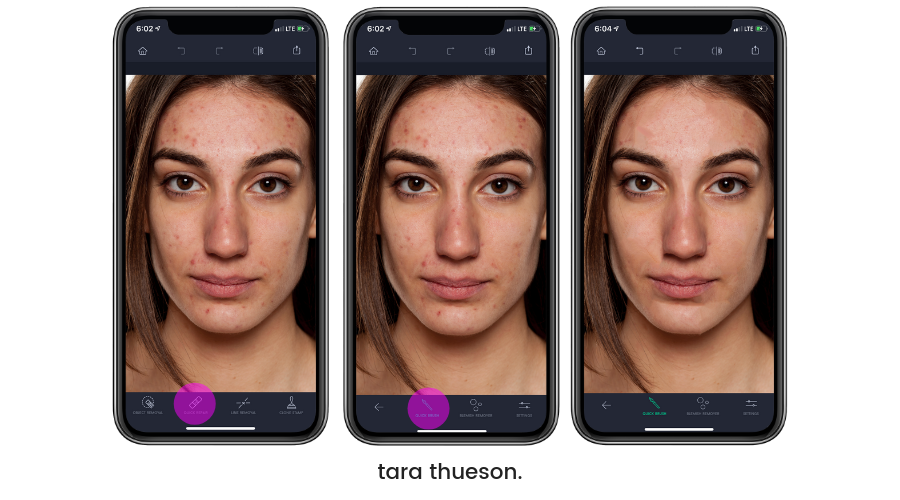
Step 1: Select Quick Repair
Step 2: Select Quick Brush
Step 3: Start drawing over an object. The moment you pick up your finger, the object disappears!
Pro Tip: While her face does look clear, it also leaves it looking really angular in a lot of places because the ‘Quick Brush’ is like wiping something away with your thumb – you’ll get it all but everything is going to look a bit smudged. You can avoid this if you’re removing one or two offensive objects but I would steer clear of it when working on the face! Here’s how the ‘Blemish Remover’ is different:
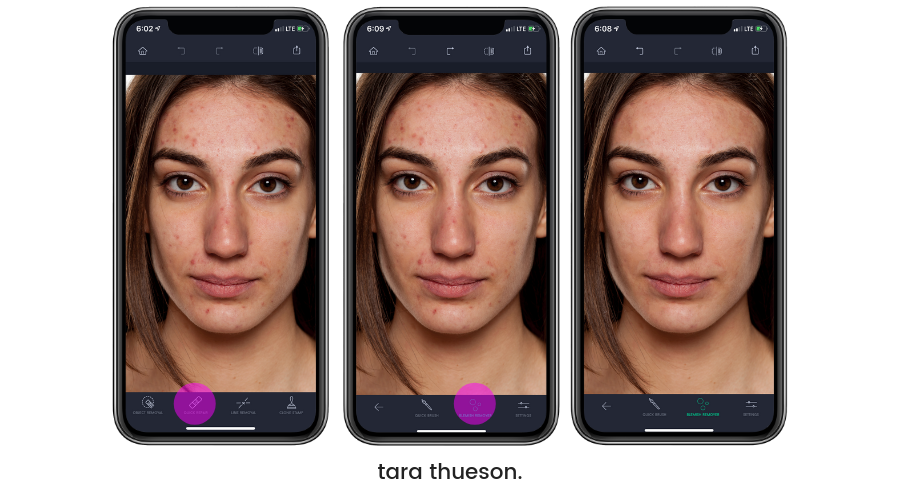
Step 1: Select Quick Repair
Step 2: Select Blemish Remover
Step 3: Tap the object you want to be removed.
This option really targets the spot you tap and doesn’t remove anything else. That’s why you’re still seeing the signs of acne here (nothing a little FaceTune can’t help 😂). If she were splattered in mud or paint, the effect would completely remove the evidence. This tool is super smart so it removes the object without blurring the background.
• • •
SHOP MY TARGET PICKS
• • •
Using The Clone Stamp
This tool is super useful if you are wanting to duplicate a texture, object, or color in another area of your photo. It can be used to remove/mask objects as well.
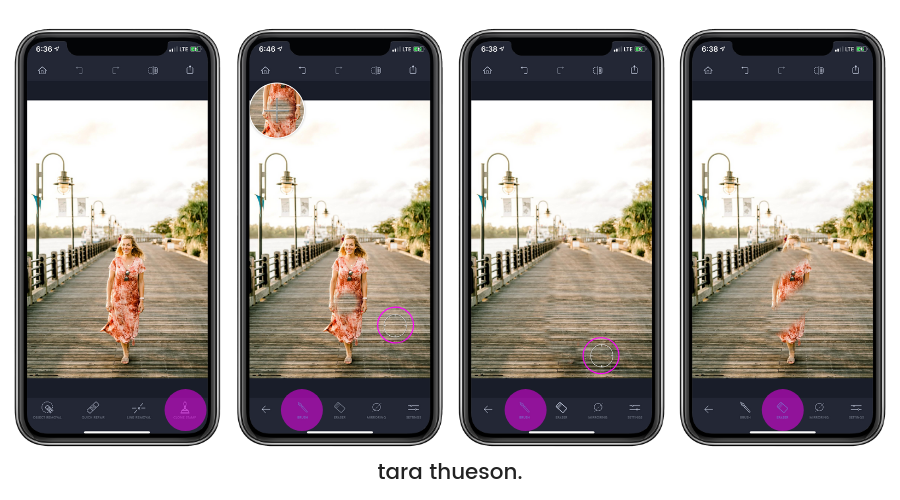
Step 1: Drag your pointer to the area you want to clone or copy
Step 2: Start brushing the screen with your finger where you want the copied content/texture to appear
Step 3: Use your eraser to remove the object or area you just cloned!
As you can see, I used it to remove myself from this picture. It’s also a tool that I could have used for Annie’s picture up above!
– – – – – –
So what do you think? Pretty cool, right? Like I said above, it’s not perfect, but if your obstructions are pretty clear of each other you can get a fairly clear picture. This app works by covering the area or blemish you want to be removed with a copy of another part of the image. That’s why moving the things in the water with Annie and removing the birds in our Disneyland photo was so simple!
If you want to try editing your pictures yourself and want to give TouchRetouch a try, you can download it here:
Download for iPhone | Download for Android
Are there other apps you can’t live without? Tell me in the comments below!
xx Tara


That’s so cool! I will definitely be downloading these. My goal this year was to take more pictures but I find it so daunting, this seems like it will definitely help me with the “perfect” picture.
It definitely will! Imagine trying to find an empty beach during the summer?!? Insane! I just had to TouchRetouch those people out 😉